Get started in 10 minutes
This page is your first ten minutes inside Archestack, sign in to a fresh trial, understand every panel of the app, ship your first change, and learn the keyboard shortcuts that turn the UI from "fine" into "fast". By the end you'll know enough to follow any of the other guides without getting lost.
Don't have a trial yet? Open archestack.eu and click Try it live - 7-day trial. Sign in with Google. Your private environment will be ready in about 30 seconds and you'll land on its dashboard automatically. Bookmark the URL, it's unique to your trial.
1. Sign in to your trial
Every trial gets a unique URL of the form https://<slug>.trial.archestack.eu.
The trial banner at the top of every screen shows how many days are left before the
environment is destroyed. Severity escalates as you get closer to the deadline (info → warning
→ error) so a glance tells you whether you have weeks or hours.
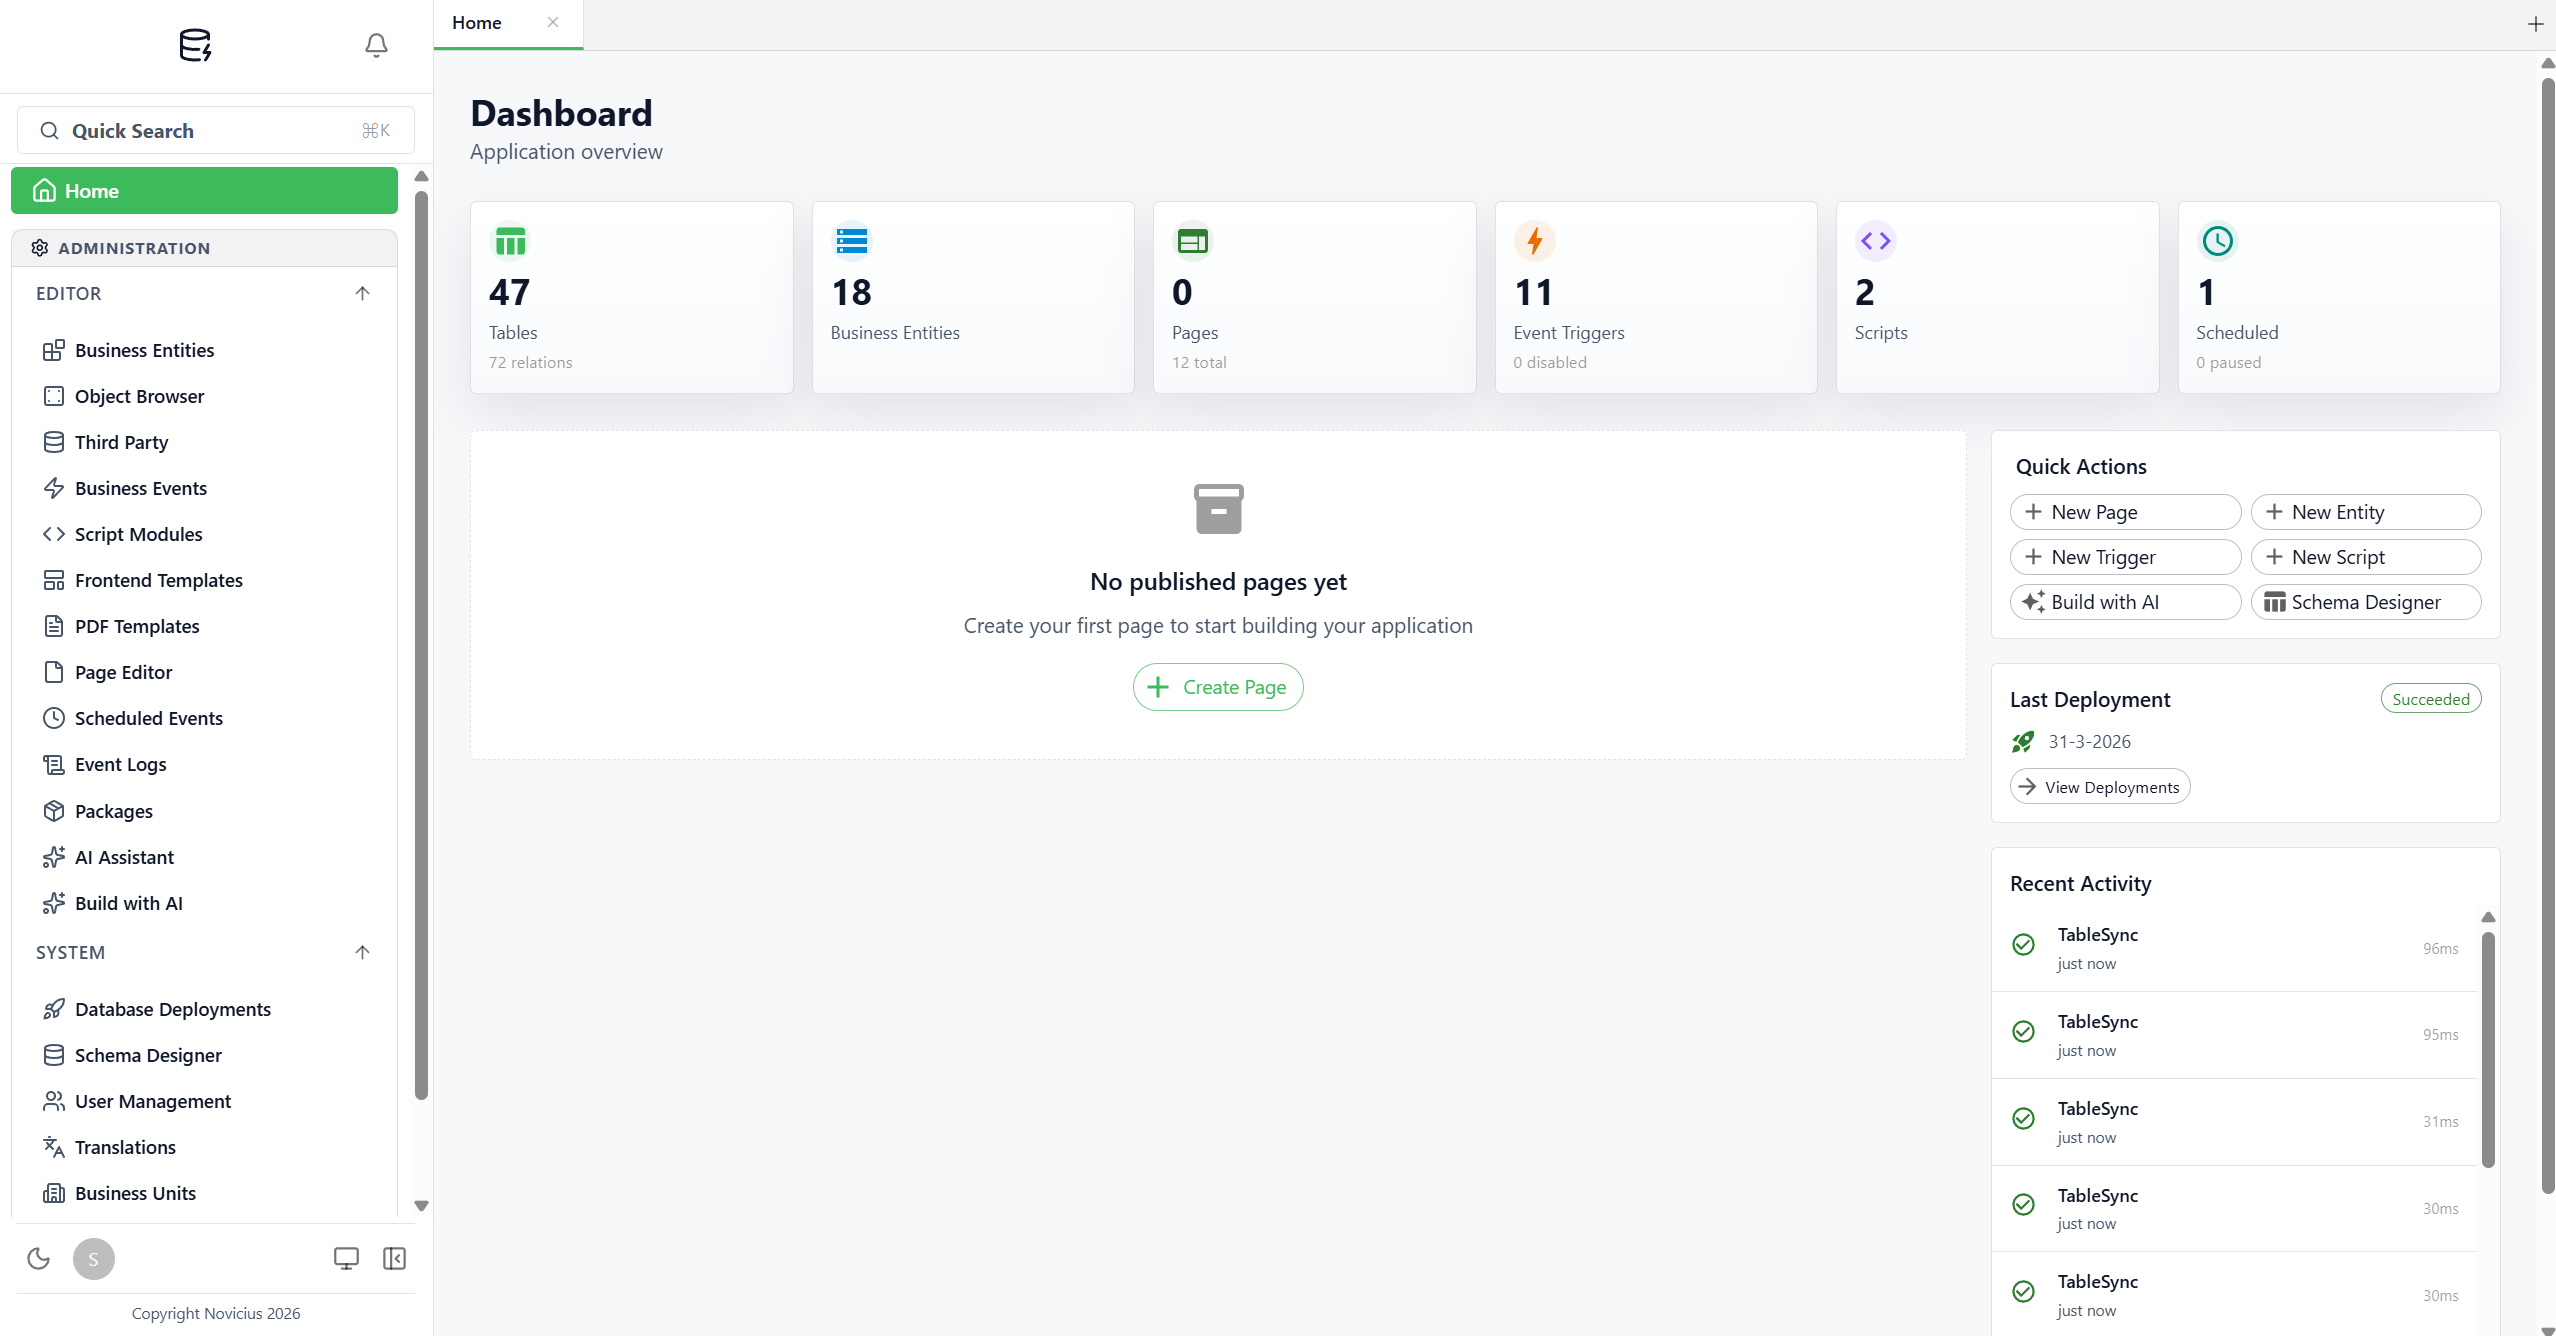
The app opens on the Home dashboard, which is intentionally empty until you build something. Don't worry, that's the point. The first time, the only signs you're "in" are the sidebar appearing on the left and your name appearing in the top-right.
What's different in trial mode
A handful of features are disabled in the trial environment to keep shared infrastructure safe. They're greyed out (or return 403 if you try to call them directly):
- Database Backups - disabled to prevent disk abuse.
- PDF rendering - both the editor's preview pane and the public generate endpoint return 403; the template editor itself still works for authoring (data script, HTML, settings), but you won't see a rendered PDF inside a trial.
Everything else works normally. When you're ready to use the locked features, contact the team via the trial banner's Upgrade button.
2. The layout, in one paragraph
On the left, the sidebar starts with a Quick Search button (or hit
Ctrl/Cmd+K) that opens the command palette, plus a Home entry,
then opens into an ADMINISTRATION section split into EDITOR
(where you'll spend most of your time, Business Entities, Page Editor, Business Events, Script
Modules, etc.) and SYSTEM (admin tools: Database Deployments, Schema Designer,
User Management, Branding, Backups). The bell icon (top-left, next to the Archestack logo)
shows unread Event Log failures. The bottom of the sidebar has the theme toggle (sun/moon),
your profile menu, a desktop-mode toggle, and a sidebar-collapse button. Once you publish a
page, it shows up under its own Modules section above ADMINISTRATION.
A closer tour
- Sidebar - EDITOR group. Business Entities, Object Browser, Third Party, Business Events, Script Modules, Frontend Templates, PDF Templates, Page Editor, Scheduled Events, Event Logs, Packages, Build with AI. The Build with AI wizard composes a prompt for an external LLM (Claude, ChatGPT, Gemini) and applies the JSON plan it gets back, see "AI Builder" in the reference page.
- Sidebar - SYSTEM group. Database Deployments, Schema Designer, User Management, Translations, Business Units, Database Backups, Branding. Less frequent, but essential when you reach for them.
- Modules (above ADMINISTRATION). Empty until you publish your first page. Published pages live here grouped by category, and that's how end users navigate to them.
- Dashboard stat cards. Tables / Business Entities / Pages / Event Triggers / Scripts / Scheduled, each tile is clickable and takes you to the relevant admin page.
- Quick Actions panel (right side of the dashboard). One-click shortcuts: New Page, New Entity, New Trigger, New Script, Build with AI, Schema Designer.
- Tabs across the top. Most editor tools open as tabs in the main pane, you can have several open at once. Click a tab to switch; close with ×. Click + to open a new tab. Tab state is stored in the URL, so refresh keeps your tabs.
- Bell icon (top-left, next to the logo). Failure notifications from Business Events, Script Modules, and Scheduled Events. Real-time via SignalR, you don't have to refresh.
- Bottom-of-sidebar controls. Theme toggle (sun/moon, admin defaults to dark, this Learn site defaults to light, both toggle independently), profile avatar (language + sign out), desktop-mode switch, and sidebar collapse.
Desktop mode
On wide screens you can press Ctrl/Cmd+Shift+D to switch to Desktop
mode, a windowed UI where each tool opens as a draggable window with a dock at the
bottom. It's the same app, just a different layout. Use whichever feels more natural; the docs
will refer to the sidebar layout because it's the default.
3. Make your first change in 5 minutes
Prefer a guided tour? The dashboard has a Start guided setup button in the top-right corner. It opens a panel that walks you through the six core building blocks (tables → entities → pages → events → scripts → PDFs), highlights the next thing to do, and can pre-load a mini CRM (Customer / Contact / Note tables) so you have something to play with. The walkthrough below covers the same ground manually, pick whichever feels better.
The fastest way to feel productive is to design a simple table, deploy it, and view its data. Let's create a "note" table.
Design the table
- Open Schema Designer from the admin section of the sidebar (route:
/schema-designer). - In the toolbar at the top, click the icon-button labeled Add Table.
- A dialog titled Create New Table opens. The "Table name" field hints at the convention: lowercase with underscores. Type
note. Click Create. - The new table appears on the canvas and the right-side panel opens with three tabs: Columns, Indexes, Relations.
-
You're on the Columns tab. The system already added an
idcolumn (SERIAL primary key, locked). At the bottom of the column list there's a dashed-border "Add column" box. Add three more columns one at a time:title· typeVARCHAR, length 500, NULL off (required).body· typeTEXT, NULL on (optional).created_at· typeTIMESTAMPTZ, defaultnow().
- The schema auto-saves, watch the indicator in the bottom-left flick from "Auto saving…" to "Saved".
Archestack adds four audit columns,created_at,updated_at,created_by,updated_by, to every table automatically and stamps them on every insert and update. Thecreated_atabove is therefore optional (we add it to match the screenshot); you never have to create or maintain those four by hand.

note table selected. Canvas (centre) shows the table card with each column and its type. Right panel: TABLE PROPERTIES at the top (Table Name, Color, Label Column, Packages), then the Columns / Indexes / Relations tabs. Each existing column expands inline with PK / NULL / UQ toggles and a Default value field. The dashed-border "Add column" box at the bottom accepts a name and type, then click the green + Add Column button.Deploy it
- In the Schema Designer toolbar, click the Deploy button (rocket icon, green). You're taken to
/database-deployments/configure/new. - You land on the Configuration tab. The pre- and post-deployment script panels are empty (default). Switch to the Generated SQL tab to see the migration the platform produced, should be a
CREATE TABLE "note" (…). - If the SQL looks right, click the Deploy button at the top right. Status updates live; on success the deployment row in Database Deployments → Overview shows "Succeeded".
Add some data
To eyeball your new table, open Object Browser, pick note from
the table list, click Add row. Type a title and body, save. You've just
created your first piece of data.
If something doesn't look right
- Table not appearing in Object Browser? Check Database Deployments, if the deployment didn't succeed, the table doesn't exist. Most failures are name conflicts or invalid type/length combinations. The deployment row's status column tells you which.
- Can't see the Columns tab in Schema Designer? You probably haven't selected a table, click on a table node in the canvas. The right panel only appears when something is selected.
- The Deploy button on the Schema Designer toolbar is greyed out? Usually means there are no pending changes. Check the auto-save indicator, if it shows "Saved" and you haven't made changes since the last deployment, there's nothing to deploy.
4. Wrap it in a real page
Object Browser is a power-user view, end users want a friendlier interface. Let's give them one:
-
Open Business Entities and click Create. A full-page editor
opens. Set Entity Name to
note, pick Master Table =note, pick Label Column =title. Save. The Visual tab shows the auto-generated columns, you can leave them as is. -
Open Page Editor (route:
/pages) and click Create. Fill in Page Name =Notes, Page Route =/notes, Business Entity =note. The page builder auto-generates a sensible layout based on the BE columns. - Flip the Published Switch in the top header to ON. The page appears under Published Pages in the sidebar. Click it, you have a working data-entry app with search, filters, and editing.
That's the whole loop: Schema → Deploy → Business Entity → Page → Publish. Every feature in Archestack either builds on this loop or extends it (events fire when data changes, scripts run on a schedule, packages bundle the loop's output for promotion).
5. Keyboard shortcuts that make you fast
Archestack's UI is mouse-friendly but most experienced users live on the keyboard. The list below covers the shortcuts that pay off immediately.
Global
Ctrl/Cmd + K- open the Command palette. Search any page, action, or Business Entity by name. The fastest way to navigate.Ctrl/Cmd + Shift + D- toggle Desktop mode (windowed UI ↔ sidebar UI).Esc- close the topmost dialog / popover.
In any list grid
↑/↓- move row selection.Enter- open the selected row.Ctrl/Cmd + F- focus the search box.
In code editors (scripts, PDF data scripts, frontend templates)
Ctrl/Cmd + Space- show IntelliSense suggestions. Note thatDb,Modules,Entity,OldEntity, andLogare the only globals, autocomplete on these works inside any script.Tab- accept the highlighted suggestion. (Accept-on-commit-character is intentionally disabled to prevent accidental insertions when you mean to type a comma or paren.)Ctrl/Cmd + S- save.
6. The Command Palette deserves its own section
Ctrl/Cmd + K opens a fuzzy-search overlay that lets you jump anywhere in the app
by typing two or three characters. It searches:
- Pages (both admin tools and your published pages).
- Business Entities by name.
- Actions like "create new BE", "open Branding", "deploy schema".
- Recent items you've opened, re-finds them in one keystroke.
The palette opens with focus on the search box, so you can start typing immediately. Up/down arrows navigate, Enter selects, Esc closes. After a few hours of use you'll find yourself using it for navigation more than the sidebar.
7. Where to go next
- Core concepts - read this if you want a mental model before clicking anything else. Covers Business Entities, Pages, Events, Scripts, and the script-callable Db API.
- Build your first app - a longer, opinionated walkthrough that ends with a multi-page mini-CRM (companies / contacts / deals) wired with auto-stamping events and a recompute script.
- Generate PDF invoices - builds on the first-app data to add a printable invoice template.
- Reference - focused entries per tool that you can dip into when you hit a specific question.
Common first questions
"Can I undo a deployment?"
Not directly, there's no Undo button. The clean recovery is either to apply a corrective deployment (drop a column you just added, etc.) or to restore from a backup. On a paid environment, take a backup before risky changes. On a trial, the simplest recovery is to start a fresh trial.
"Can I have multiple pages on the same BE?"
Yes, any number. Different routes, different layouts, different column choices. Common
pattern: a simple list page at /customers for everyone and a more detailed
/customers/admin for back-office users (gated by a Business Unit or role).
"Where do I edit field labels and column headers?"
Two places, depending on what you want to change. The label that appears in the page (e.g. "Company name" instead of "Name") comes from the Business Entity's column config. The label that appears system-wide for a translation key (e.g. UI strings like "Save", "Cancel") lives in Translations.
"My page is empty. Where's my data?"
Three usual suspects, in order of likelihood:
- Wrong active Business Unit, check the BU switcher in the top bar.
- The Business Entity has a default filter that's hiding your data, open the BE and check.
- You added rows in Object Browser to a different table than you think (look at the table name in the breadcrumb).
"How do I get the current user's email in a script or trigger?"
You can't, today. Scripts only have Entity, OldEntity,
Log, Db, and Modules, there is no User
global. Template expressions ({{ … }}) similarly have no
{{ user.email }} token. If you need user identity in a rule, capture it from
the front end and pass it on the record at insert time, then read it from there.
"Can I run Archestack locally on my machine?"
Yes, there's a docker-compose.yml in the repo that brings up a self-contained
PostgreSQL + Keycloak + API + Web. It's documented for engineers who want to develop the
platform itself. For evaluation, the trial environment is much faster to get going.
"How do I extend the platform with custom code?"
Two extension points cover almost everything: Script Modules for backend logic (C# compiled at runtime) and Frontend Templates for custom UI fragments (TSX). For deeper changes, custom controllers, new tables that the platform itself needs, that's a fork-and-build territory and out of scope for this site.